Create pipeline
Now let’s create the CodePipeline pipeline for this application.
- In the terminal tab, run this command to deploy the pipeline.
sam deploy -t codepipeline.yaml --stack-name api-pipeline-stack --capabilities=CAPABILITY_IAM
PLEASE NOTE: This may take ~ 5 minutes to complete. In the meantime, you can look at the SAM documentation.
Let’s look at what was created during this step. This step created multiple steps.
- Source step - get the code from repo
- Update Pipeline step - change the pipeline if there are any changes
- Build and Package - builds and packages the application
- Deploy to Test - deploy the application to the Development environment
- Deploy to Prod - deploys the application to the Production environment
Let’s go through the pipeline itself.
- Go to CodePipeline.
- Click on the name of the pipeline starting with api-pipeline-stack…
- View the details of the pipeline.
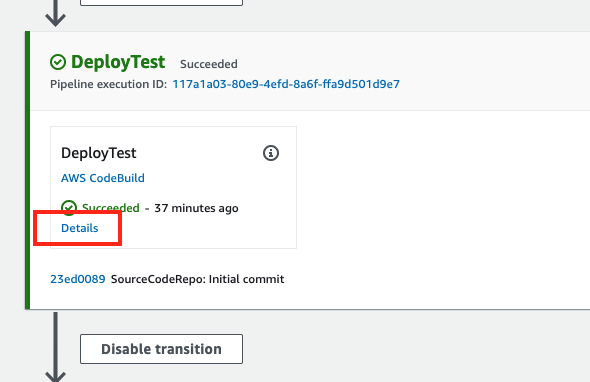
- Go to the DeployTest step and click “Details” link. This will take you to the Build log.

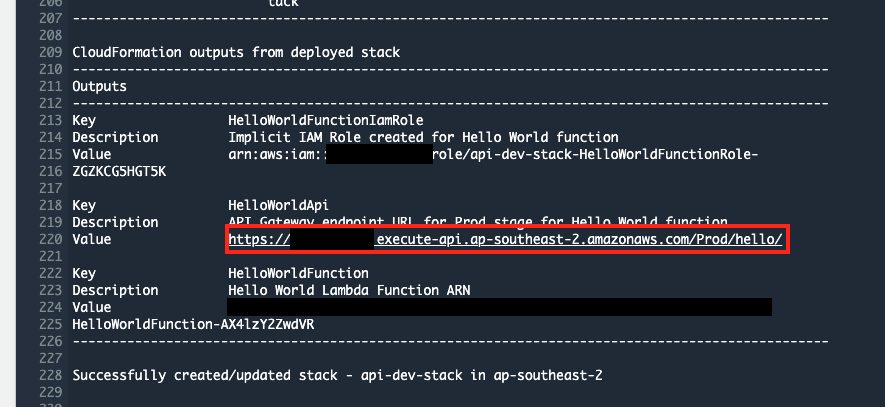
- At the bottom of the logs, you will see the outputs. Copy the link of the REST API endpoint and open it in a new window. It should read {“message”:“hello serverless friends”, “count”:1}

Now let’s go back to Cloud9 and make a change, and see how CodePipeline will deploy it for us.