Set up pipeline
Let’s go through the instructions to set up CI/CD pipeline using AWS SAM.
- In the terminal tab, enter
cd ~/environment/api. - Enter
sam pipeline init --bootstrap. - Enter
1to select an AWS Quick Start Pipeline templates. - Enter
4for CodePipeline. - Enter
ywhen prompted to go through the setup process.
Now let’s create Stage 1.
- Enter
devfor Stage name. - Enter
2for named profile. - Enter Return key to select the default region.
- Enter Return key to create a new pipeline user.
- Enter Return key to create a new pipeline execution role.
- Enter Return key to create a new CloudFormation execution role.
- Enter Return key to create a new artifact bucket.
- Enter Return key to selet the default that specifies no IMAGE type lambdas.
- Enter Return key to confirm the values.
- Enter
ykey to proceed with creation.
This will kick off an AWS CloudFormation template in the background with the resources needed to set up the dev pipeline for us. PLEASE NOTE: This part will take ~ 2 minutes to complete.
Now let’s continue to create Stage 2.
- Enter
ywhen prompted to go through the setup process. - Enter
prodfor Stage name. - Enter
2for named profile. - Enter Return key to select the default region.
- Enter Return key to create a new pipeline execution role.
- Enter Return key to create a new CloudFormation execution role.
- Enter Return key to create a new artifact bucket.
- Enter Return key to selet the default that specifies no IMAGE type lambdas.
- Enter Return key to confirm the values.
- Enter
ykey to proceed with creation.
This will kick off another AWS CloudFormation template in the background with the resources needed to set up the prod pipeline for us. PLEASE NOTE: This part will take ~ 2 minutes to complete.
The console will output the details of the Pipeline IAM user. This will be used to connect the pipeline to be able to deploy the solution.

Let’s continue creating the pipeline.
- Enter
2to select CodeCommit as the Git provider. - Enter
apifor the repository name (we will create this repository on our next step). - Enter Return key to select the default branch name main.
- Enter Return key to select the default path for template.yaml file.
- Enter
1to select dev as Stage 1. - Enter
api-dev-stackfor stack name for Stage 1. - Enter
2to select dev as Stage 2. - Enter
api-prod-stackfor stack name for Stage 2.
Let’s look at what happened.
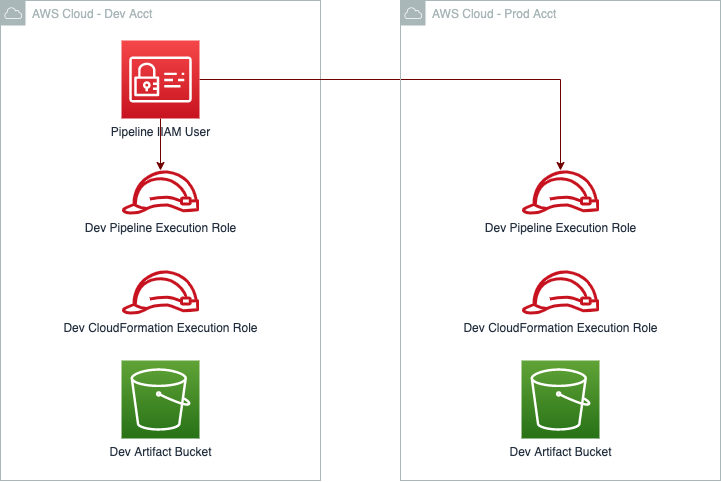
First, the sam pipelines created 2 CloudFormation stacks for us, one for each stage, to create the necessary security plumbing as well as buckets to upload artifacts to. The configuration is stored in .aws-sam/pipeline/pipelineconfig.toml file. Feel free to browse through this file to understand how it is all set up. NOTE: if you can’t see the api/.aws-sam/ folder, please click the gear icon at the top right corner of the file navigation pane, and select Show Hidden Files option.

Second, it creates a api/pipeline/ folder with the build specification that will be used to build, test and deploy the solution. Feel free to browse through the files to understand how it is all set up.
Next, let’s upload our code to the repository.